This video can tell you how to convert PowerPoint to AVI with a PowerPoint to video converter such as Wondershare PPT2Video Pro.
--------------------------------------------------------------------------------------------
PowerPoint to Movie – Total Guide to you
PPS to MPEG – How to View PPS files on Your Portable Device
Sep 6, 2010
Video about How to Convert PowerPoint to AVI

Aug 25, 2010
Make a Unique Wedding DVD Slideshow Invitation
Next month, Sandy’s wedding will be held in Sheng An church. She was immersed in a great sense of satisfaction and enjoyment. However wedding invitation bothered her these days. Sandy hope I can give her a unique and personalized idea about wedding invitation. She wants this invitation can share her memorable memories and happy time with others. An idea flash into my mind, wedding DVD slideshow invitation can satisfy her.
DVD wedding slideshow invitations can seamlessly combine the traditional written invitation with photos, music, personal messages and your love story into a DVD disc for making a unique and creative wedding invitation. Please follow me to make a personalized DVD wedding invitation to invite your friends for wedding ceremony.
Tools you need:PowerPoint and a PowerPoint to DVD converter can help you to make a personalized and meaningful wedding DVD slideshow invitation easily.
How to make a Wedding DVD Slideshow Invitation with PowerPoint and PowerPoint to DVD converter?
1. Wedding PowerPoint templates: Your friends will be delighted as they watch your beautiful wedding DVD slideshow. There are many free PowerPoint templates you can download from websites. You can choose a sweet background for your wedding DVD slideshow invitation. http://www.ppt-to-dvd.com/freetemplates/free-wedding-powerpoint-templates.html#240 http://www.acoolsoft.com/free-powerpoint-templates/wedding-powerpoint-templates.html#240 You just need open your PowerPoint and select the wedding PowerPoint template.
2. Wedding songs:Wedding songs are an important factor for wedding DVD slideshow invitation. They set the general mood and tone for your invitation or ceremony, while also allow you to express your feelings through music.
Here is a list of Top Ten Wedding invitation Songs:1. Nothing Compares To You. Sinead O’Connor 2. Close To You. Maxi Priest 3. Power of Love. Jennifer Rush 4. Love Me Tender. Elvis Presley 5. I Can’t Help Falling in Love with You. Elvis Presley 6. Just the Way You Are. Billy Joel 7. When You Say Nothing At All. Ronan Keating 8. From This Moment On. Shania Twain 9. You Made Me Love You. Al Jolson 10. How Deep Is Your Love. Bee Gees
For inserting a song to your slideshow, you just need to click the Insert Sound, then you can insert a selected song to the slideshow from your computer.
3. Wedding photos:Select photos from your album for wedding DVD slideshow invitation. You can share your love story with your friends from these photos such as wedding pictures. For inserting pictures you need to click Insert Pictures, then select pictures just prepared.
4. Add animations to Wedding slideshow:Add animations to your photos can spread happiness to your friends with wedding DVD slideshow invitation. Click Animations Custom Animation, then you can customize the animations to the objects in your wedding slideshow.
5. Burn wedding slideshow into DVD disc for distributing to your friendsThis is the last step to make a wedding DVD slideshow invitation. In this step, you can use a PowerPoint to DVD converter for burning your slideshow into a DVD disc. Then distribute this unique wedding DVD slideshow invitation for inviting your friends.
Use wedding DVD slideshow invitation for sharing your happy time with your friends.
>-------------------------------------------------------------------------------------------
Related articles:
PowerPoint to Movie – Total Guide to you
Convert PowerPoint 2007 to DVD with Online PowerPoint Converters

Oct 20, 2009
The First PowerPoint to DVD Burner that Receives Windows 7 Certification – Wondershare PPT2DVD 6.0
Oct 19th, 2009 - Wondershare Software Co., Ltd, an innovative provider of consumer software, today announced the release of its flagship product Wondershare PP2DVD V6.0, which is the first PowerPoint to DVD burner that has passed the Windows 7 certification process and received the official “compatible with Windows 7” logo from Microsoft Corp.
Wondershare PPT2DVD V6.0 enables users to burn PowerPoint to DVD for playback on TV through DVD players on Windows 7-based PCs with high compatibility and reliability.
“We are proud to receive the Windows 7 logo certification,” said David Chen, the Director of Marketing of Wondershare, “and excited to announce that the products PPT to Video and PPT2Flash also work perfectly under Windows 7.”
What’s New in Wondershare PPT2DVD 6.0:
- Brand-new application interface
- Simplify the operation process, and improve the ease to use and stability of this product
- Speed up the conversion process by 30% to 50% compared to the last version in average
- More delicate DVD menus added to meet different customer needs
Key Features of Wondershare PPT2DVD:
- Support converting PPSX, PPS, PPTX, PPT to DVD or video
- Create eye-catching DVD menus with delicate built-in DVD menu templates
- Stable conversion process to convert PowerPoint to DVD
- Retain all features in the original PowerPoint
More details about Wondershare PPT2DVD, please visit: http://www.ppt-to-dvd.com/ppt2dvd/overview.html
Pricing and Availability:
Wondershare PPT2DVD is a now available at $99.95 per single-user license. A free trial version is available for downloading at: http://www.ppt-to-dvd.com/download/download.php
About Wondershare Software Co., Ltd.
Established in 2003 and located in Shenzhen, adjacent to the international financial and trade center Hong Kong, Wondershare has extended its business worldwide, consistently dedicated to satisfy customers with diversified consumer software products and services.
Aug 25, 2009
How to Enhance Digital Photo for Photo Album Making
We may take many photos on Holidays and events, like Birthday, Wedding, and Reunion. With these beautiful or funny pictures, we would like to make a photo album with animation and music to bring more life to the pictures.
If you have PowerPoint, it is recommended in my old posts to make digital photo album.
Before we start to add photos to our photo album project, we may need to optimize or enhance the picture with some special effects.
We do not have professional photo editing tool Photoshop. What can we do?
Don’t worry. We can use some online free photo editor to do this.
The following two recommended websites would help you.
http://editor.pho.to/
http://www.freeonlinephotoeditor.com
We can use them to:
1> Rotate, Crop and Resize it.
2> Adjust its basic effects.
3> Enhance it by applying special or artistic effects.
4> Add frames, texts (or glitter texts) or even watermark.
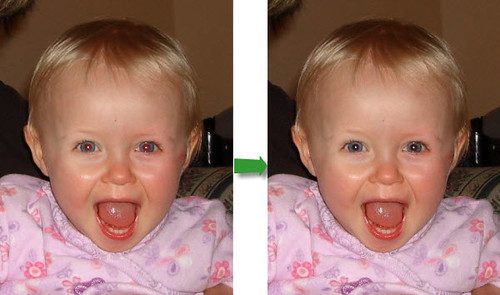
Here below are three samples made by me.
To remove the red-eye with one click
http://farm4.static.flickr.com/3330/3649407279_dbf6cb0571.jpg?v=0
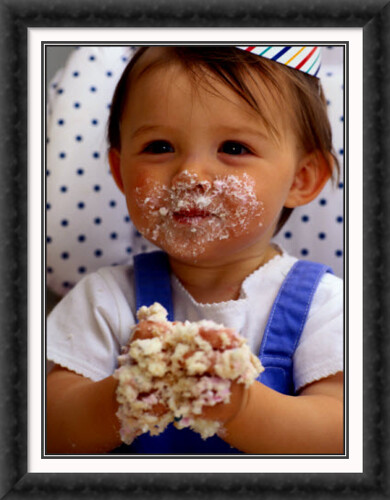
To add frame
http://farm4.static.flickr.com/3642/3649407365_23959fa973.jpg?v=0
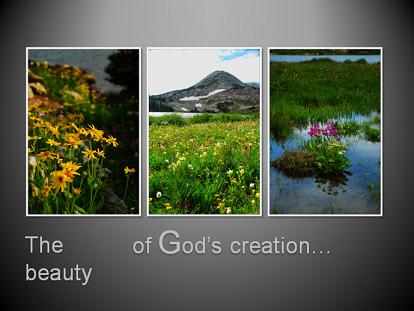
To apply artistic effect and add glitter text
http://farm3.static.flickr.com/2432/3649407443_dfccf8895b.jpg?v=0
Besides these kinds of online editor, you can also use some shareware to make photo collages for the photo album, digital scrapbook.
If you have Windows PC, you may try this Photo Collage.
If you have Mac, you may try this iCollage tool.
Article from:
http://videopptpower.wordpress.com/2009/06/22/how-to-enhance-digital-photo-for-photo-album-making/
Enjoy it, share it.
Aug 10, 2009
Create a back-to-school Slideshow
As summer vacation goes to the end, the new semester begins. Kids should go back to school. Through the long holiday, they would miss each other very much. Thus, it would be a wonderful idea for teachers to hold a story-telling class. Teachers can ask students to collect their summer vacation stories and make into story slideshows by themselves, and then show the story with others. It is good for improving the relationship among students and also cultivating their various interests, broadening their view sights.
Besides, it is a fun way to integrate literacy and technology into the multimedia classroom. The following are the steps on how teachers to hold such an activity.
1. Ask students prepare the story slideshow
Step 1: Choose tool and prepare resources
A computer with Microsoft PowerPoint 2007 or any other early versions installed.
As a teacher, you can also provide your kids with some stunning PowerPoint templates. You can find some educational PowerPoint templates from the link below.
http://www.ppt2dvd.com/freetemplates/free-education-powerpoint-templates.html#149
Step 2: Create a story slideshow
Part I -Prepare Slides
Help each student to create an about 5 slides story PowerPoint slideshow with some interesting and special things happened during their summer vacation.
Part II – Import the photos and add descriptions
When students begin to import the photos to the presentation, you can help them to edit photo shapes in PowerPoint to make their photos look more beautiful and perfect. Please follow the simple steps below: Open PowerPoint 2007 -> Insert -> Images -> Choose photos. Then double click a photo, you can see the Picture Tools options in the tool bar. With it, you can get any picture style or shape you want because more than a hundred shapes are provided here. Comparing with other photo editing tools, I think PowerPoint editor is really convenient and easy-to-use. When you settle down the issue of photo edition, now you can help them to add some descriptions to their story slideshows.

2. Students share story slideshows one by one in story-telling class
When slideshows are completed, now it is the time for children to share their story slideshows in story-telling class. It is a good way to develop the skills of telling story for children to share story slideshow in the front of classmates. Here are some points you can remind children to pay more attention to while sharing story slideshows.
• Don't stare at the story slideshow all the time, just recite all the information from memory.
• Ask some questions to attract the attention of your classmates. When they give a correct answer to your question you presented, they can win a piece of candy or something else. It is a good way to ask them to interactive with you.
• Be self-confident while speaking. Don't talk monotonously like Ben Stein, have some flare.
• Put some comedic relief into your story slideshow to relieve a little bit of the boredom, maybe something tiny about half-way through the story slideshow.
3. Teachers integrate all story slideshows to one back-to-school slideshow
After the story-telling class, you can integrate all story slideshows to one back-to-school slideshow as a souvenir. Following are some advices for you to create a back-to-school slideshow.
•Prepare a wonderful introduction and ending for the back-to-school slideshow. In addition, you can add some good wishes or new semester goals for children.
•Choose an appropriate song for the back-to-school slideshow, click here to learn more how to add music file to back-to-school slideshow.
4. Enjoy the back-to-school slideshow together
Now you can enjoy the back-to-school slideshow with your students together through the Projector. Furthermore, if you want to distribute it to your kids and even to the ones who do not have computers, and also want to share it with your friends or put it online, you can convert slideshow to video with the help of Wondershare PPT to Video or Convert Slideshow to DVD to View Slideshow on TV with your family members.
If you are a teacher, you can get Wondershare software all PowerPoint conversion programs with 40% discount during their Back to School Offer. Please feel free to contact them.
Enjoy it and wish you have a good beginning of the new semester.
Jul 21, 2009
A Better Way to Host Summer Family Reunion - Enjoy Genealogy Slideshow

Summer vacation is the perfect time of one year for people to hold their annual family reunion. Therefore, summer family reunion is very popular.
Each year, we have experienced our reunion with all kinds of activities such as planting a tree, organizing a family softball /volleyball game, enjoying the sunshine at a beach and so on. Would you want to spend this family reunion in a meaningful and economical way during such recession time? Here below is a one-day gathering timeline and activity outline.
Activity outline of this summer vacation
- Morning~noon: Drive to get together around noon
- Afternoon: Have a simple lunch and then enjoy genealogy slideshow made with memorable pictures, from the new babies to the proud grandparents
- Night: Hold a Night BBQ along with talent show to bring your own karaoke music
You do not need to go out farther and do not need to pay for the recreation ground to save your budget. Certainly, you can incorporate some other activities to plan a two-day reunion.
Create a genealogy slideshow
1>Things to be prepared
- A computer with PowerPoint installed, or some other photo slideshow software
- Pictures of family members
2>Steps to create a genealogy slideshow
Step 1: Collect pictures
You should ask other family members to provide pictures.
Pictures on special events or funny pictures about your family members would be OK. Pictures and video clips of both new babies and grandparents are required.
Step 2: Save all the digital pictures and the scanned ones in a new document with a name of family album.
Step 3: Create a family reunion slideshow with PowerPoint and you can start the album with the pictures of your forefathers, and then the younger ones, at last the kids.
Step 4: Add a number of vivid caption bubbles to describe the pictures and bring more life to this slideshow.
Step 5: Add video clips to your slideshow
You can add some family video clips that you have collected from the family member to spice up your slideshow. Click here to know how to add videos to PowerPoint presentation.
Step 6: Add music to your slideshow
Click the article How to Add Music Song to PowerPoint Presentation to know the details.
Recommended sweet songs
Here is a list of songs that really show an appreciation and love between or for family members, you can choose one of them to add to your slideshow.
"Butterfly Kisses" by Bob Carlisle
"Then They Do" by Trace Adkins
"Find Your Wings" by Mark Harris
"My Front Porch Looking In" by Lonestar
"I Will Be Here" by Steven Curtis Chapman
…
Well done! A meaningful genealogy slideshow is completed ahead of your family reunion.
Enjoy the genealogy slideshow
Family members can enjoy the genealogy slideshow that you created after lunch. You can view it on computer with your family together. I also want to suggest you view PowerPoint slideshow on wide screen TV or plasma if you have a big family.
To view PowerPoint slideshow on TV, you need to save your PowerPoint to DVD. There are many ways to burn PowerPoint to DVD. An all-on-one PowerPoint to DVD burner named PPT2DVD is recommended. With the built-in burner of this PowerPoint to DVD converter, you can make duplicated copies by burning the output DVD folder or image (iso) file to blank DVDs without converting it again. Then you can disperse it to your relatives for long preserve and memory.
During the Night BBQ and talent show, you may also take vast amount of pictures. In the same way, you can create and distribute the slideshow to other members. You can also make karaoke music DVD with this method.
Enjoy it and have a nice summer family reunion.
Subscribe to:
Posts (Atom)